

If you have an older motherboard or PC that doesn’t have an NVME slot but has a PCIe slot, you can still upgrade to an M.2 NVME SSD. All you need is a PCIe to M.2 NVME adapter card. In this article, we’ll show you how to install an M.2 NVME SSD on a motherboard without an NVME slot, but with a PCIe to M.2 NVME adapter card available.
Step 1: Check for Compatibility
Before purchasing an M.2 NVME SSD and adapter card, ensure that your motherboard supports booting from a PCIe SSD. Check the specifications of your motherboard to see if it has an available PCIe slot that supports bootable PCIe SSDs. If your motherboard doesn’t support booting from a PCIe SSD, you won’t be able to use an NVME SSD with an adapter card. However there is a trick to boot from NVME SSD.
Please read this post to learn a trick to boot from NVME SSD on old PC: link
Step 2: Purchase a PCIe to M.2 NVME Adapter Card
If your motherboard supports booting from a PCIe SSD, the next step is to purchase a PCIe to M.2 NVME adapter card. Make sure the adapter card is compatible with your M.2 NVME SSD and your motherboard’s PCIe slot.
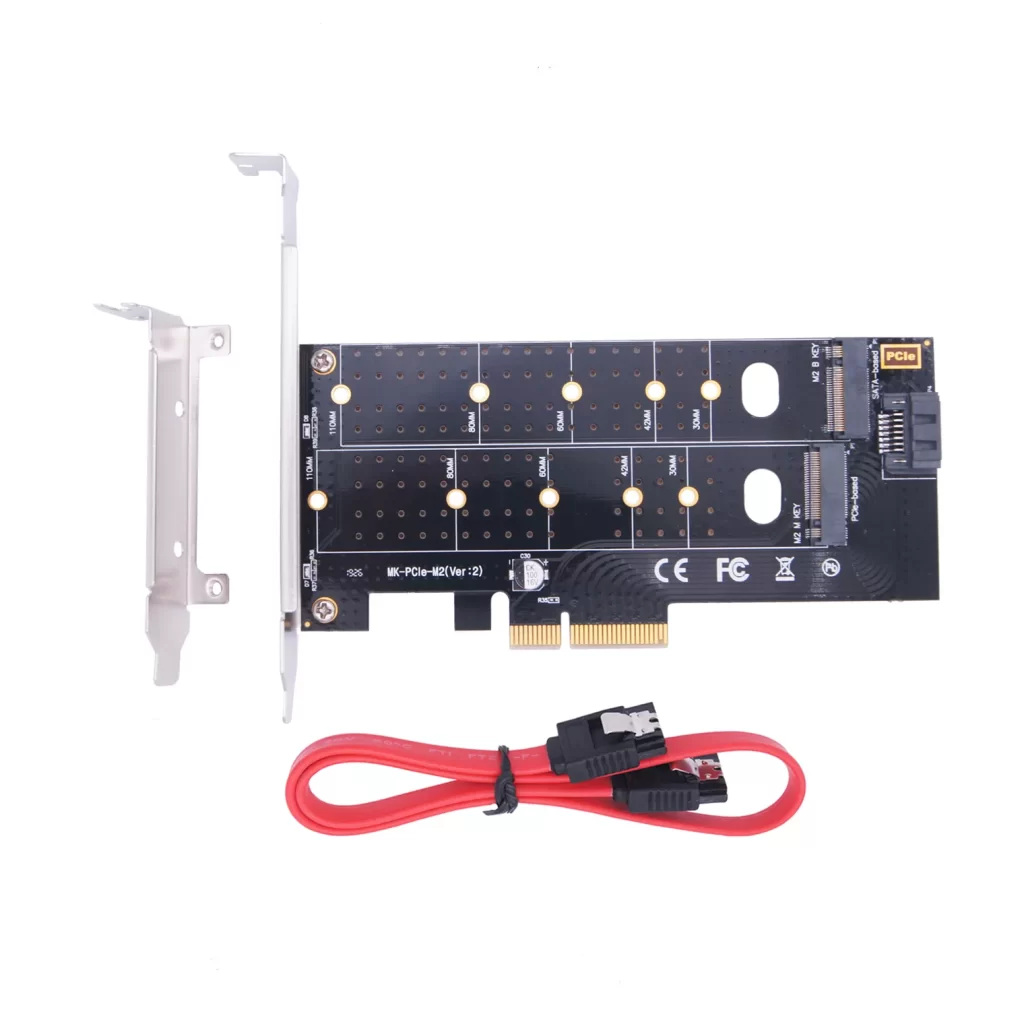
Here is a good quality PCIE to dual M.2 SSD adapter card. It supports both M.2 SATA as well as M.2 NVME SSDs simultaneously.
Step 3: Install the M.2 NVME SSD on the Adapter Card
After purchasing and installing the PCIe to M.2 NVME adapter card, it’s time to install the M.2 NVME SSD. Here are the steps to follow:
- Locate the M.2 slot on the adapter card. The slot should have a notch that aligns with the notch on the M.2 SSD.
- Insert the M.2 NVME SSD into the adapter card at an angle of 30 to 45 degrees.
- Push the SSD down into the adapter until it clicks into place.
- Secure the adapter with the screw provided by the manufacturer.
Step 4: Install the PCIe Adapter
Once you’ve installed the M.2 NVME SSD on the adapter card, you need to install the adapter card into the available PCIe slot. Here are the steps to follow:
- Locate an available PCIe slot on your motherboard.
- Insert the PCIe adapter card into the slot. Make sure the card is properly seated in the slot.
- Secure the adapter card with the screw provided by the manufacturer.
Step 5: Configure the SSD
After installing the M.2 NVME SSD, you’ll need to configure it in your operating system. Here are the steps to follow:
- Boot up your system and enter the BIOS.
- Make sure the M.2 NVME SSD is recognized by the BIOS. If it isn’t, check the installation and make sure it is properly seated in the adapter card.
- Save changes and exit the BIOS.
- Once you’re in your operating system, initialize and format the SSD. If you’re using Windows, you can do this by opening Disk Management and following the prompts to initialize and format the SSD.
Conclusion
Upgrading to an M.2 NVME SSD on an older motherboard or PC without an NVME slot is possible with a PCIe to M.2 NVME adapter card. However, it’s important to check for compatibility, purchase a compatible adapter card, update your BIOS, and follow the proper steps for installation and configuration. By following these steps, you’ll be able to enjoy the benefits of faster storage on your older system.
Very helpful and and Team Bytesblues is helpful, Economy and reliable too. thank you so much!!